Product docs and API reference are now on Akamai TechDocs.
Search product docs.
Search for “” in product docs.
Search API reference.
Search for “” in API reference.
Search Results
results matching
results
No Results
Filters
Install Alpine Linux on your Linode
Traducciones al EspañolEstamos traduciendo nuestros guías y tutoriales al Español. Es posible que usted esté viendo una traducción generada automáticamente. Estamos trabajando con traductores profesionales para verificar las traducciones de nuestro sitio web. Este proyecto es un trabajo en curso.
DeprecatedThis guide has been deprecated and is no longer being maintained.


Alpine Linux is a small, security-oriented Linux distro. It’s regularly updated with security patches, and runs on the grsecurity kernel. All binaries are statically linked and built against musl libc .
Before You Begin
Familiarize yourself with Lish , as most of this guide will require an out-of-band connection.
Installing Alpine in this manner will destroy all existing data on the installation target disks. Back up all data on the disks which you intend to install Alpine on.
The initial portion of this guide involves creating the disk images, so you make sure you have plenty of free space for them. A minimal installation of Alpine requires less than 1 GB, but depending on your needs, you may want to allow for more.
This guide assumes a consistent present working directory, meaning all commands should be run from the same directory. In most cases, it will be
/alpineor a chroot of said directory.Important While this guide will provide you with a fully operational Alpine installation, be aware that Linode does not provide official support for Alpine Linux and cannot guarantee its stability or security. Please consider this before proceeding.
Prepare the Linode
Disk Images
In this section, we’ll create the disk images necessary to install Alpine Linux. Although it is not strictly necessary, giving each disk a descriptive name upon creation will make it easier to keep track of its role in the system.
Log in to the Linode Manager and select the Linode to install Alpine Linux on.
Create your boot disk image by selecting Create a new Disk under the Disks section. The size should be between 128 and 256 MB, and the type should be ext4.
Note Boot drives (disk images) will need to store your kernel and your initramfs. Currently, Alpine will need about 21 MB for each kernel/initramfs combination, so even 128 MB is enough for several kernel versions, just remember to keep an eye on the available storage in/bootwhen you perform upgrades of the kernel.Create your root disk image with as much space as you need, although if you want a swap disk image, make sure you leave room for it. The root disk image should be of the ext4 type as well.
Optionally, create a swap disk image with type swap.
Note Between 256 and 512 MB of swap is a good estimate. Many sources recommend much more than this, but a new installation of Alpine will use less than 50 MB of RAM when fully booted.
Configuration Profile
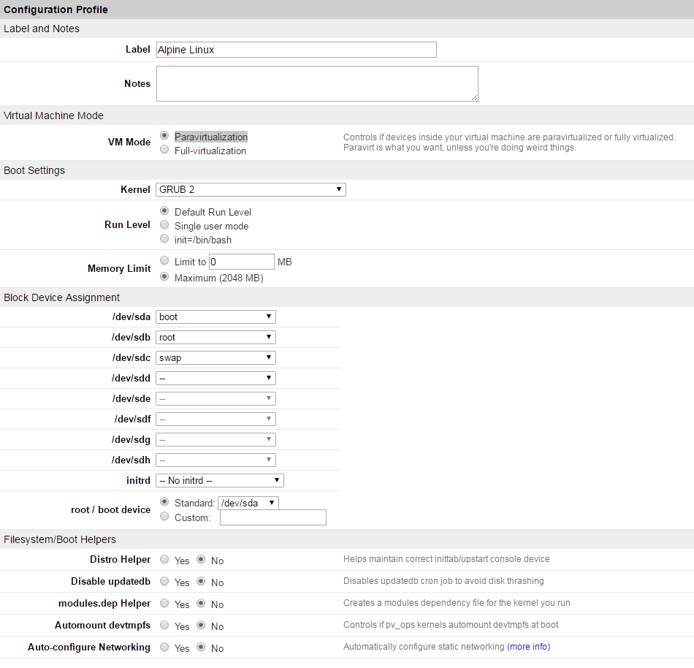
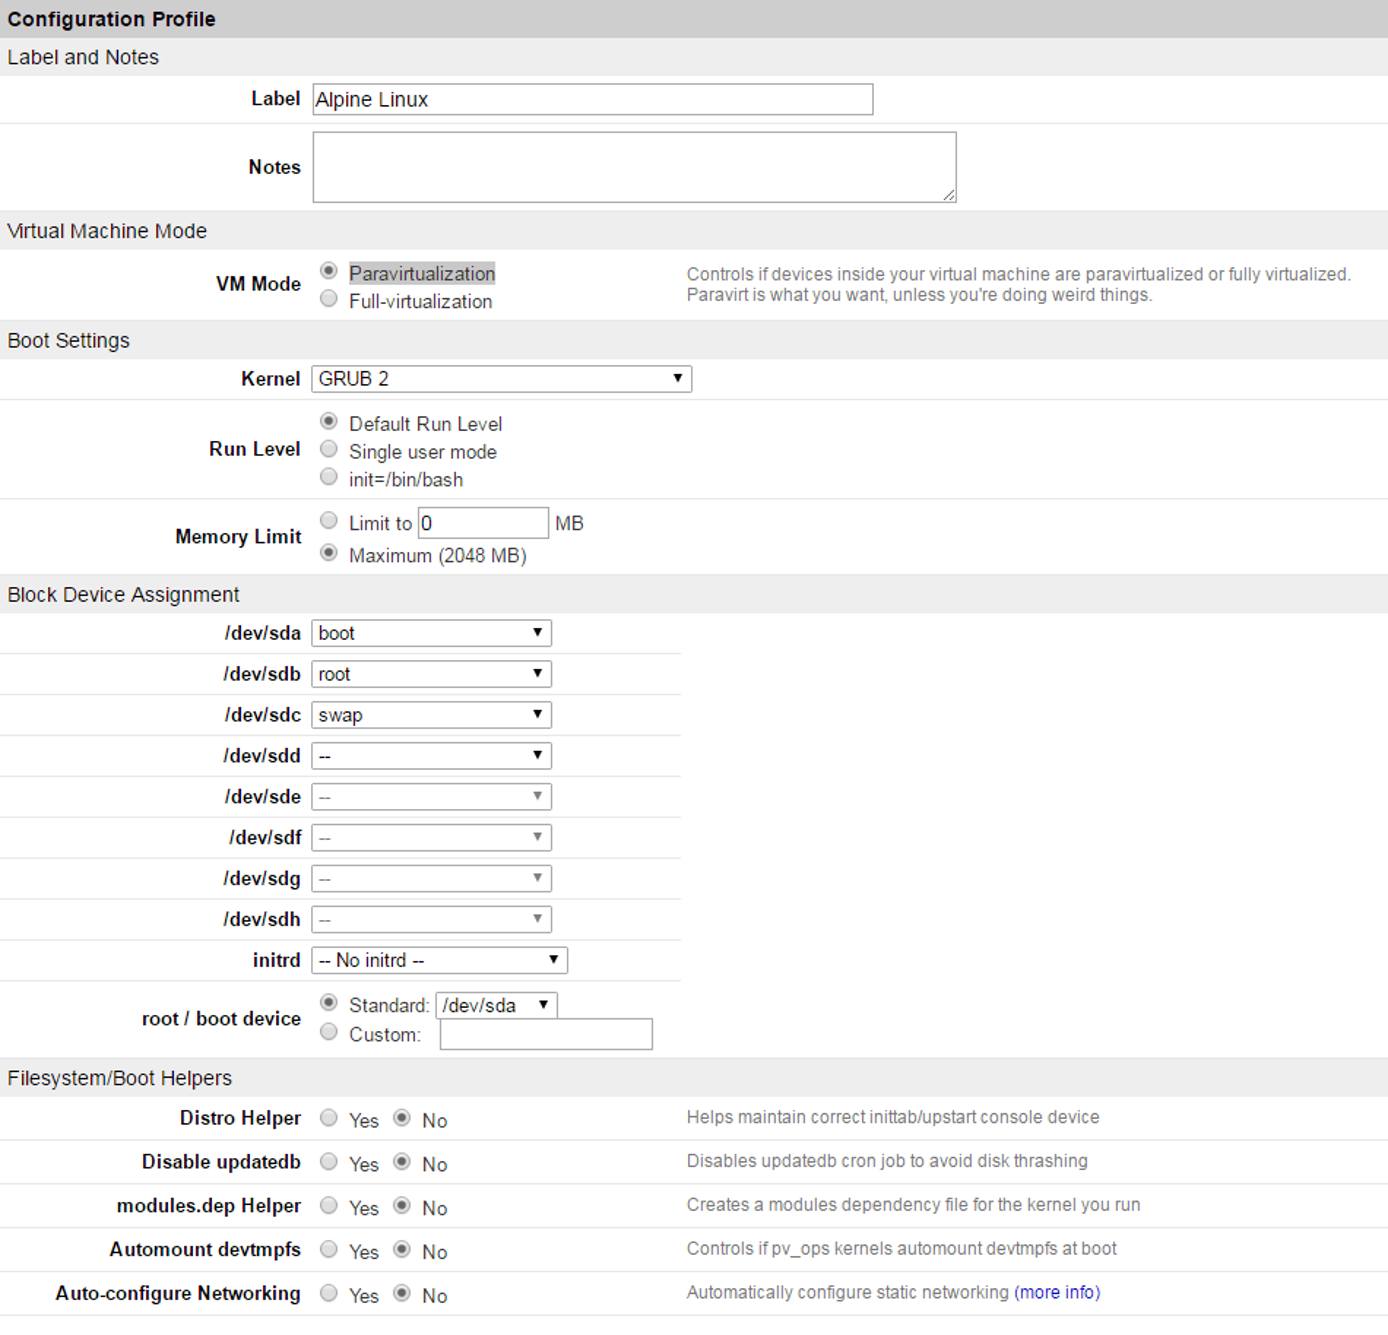
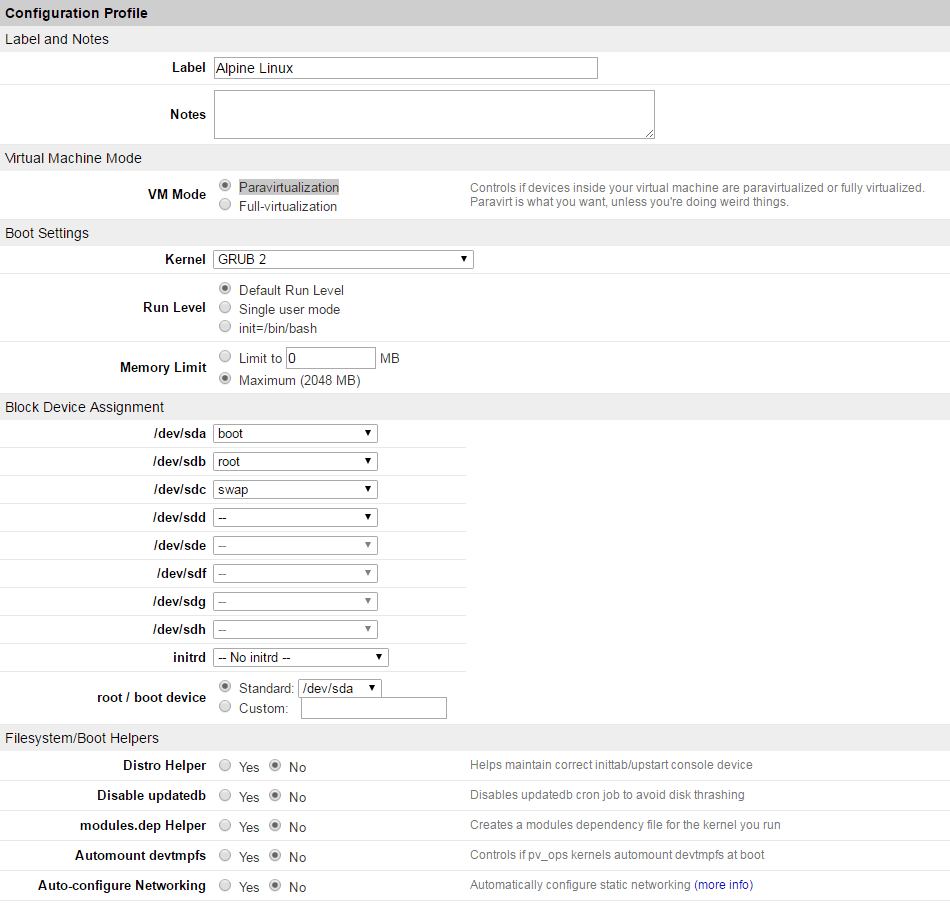
Create a new configuration profile for your Linode. Choose GRUB 2 from the kernel menu, which will use the GRUB 2 bootloader to boot Alpine’s kernel from your disk image. Set your boot disk image as /dev/sda, your root disk image as /dev/sdb, and your swap disk image, if you created one, as /dev/sdc.
Turn off all the Filesystem/Boot Helpers. The rest of the settings can be left at their default values.


Install Alpine Linux
Boot into Rescue Mode
From the Linode Cloud Manager, boot your Linode into Rescue Mode , with your boot disk image as
/dev/sda, your root disk image as/dev/sdb, and your swap as /dev/sdc.Once the Linode has booted, connect to it via Lish. If you are not familiar with Lish, there is a simple web interface for it in the Linode Cloud Manager. Access it by clicking the Launch Console link from the Linode’s dashboard.
Mount Drives
Create the
/alpinedirectory. This will serve as a mount point for the root disk image:mkdir /alpineMount the root disk to the new
/alpinedirectory and navigate to it:mount /dev/sdb /alpine cd /alpineCreate a
bootdirectory and mount the boot disk image to it:mkdir boot mount /dev/sda /alpine/boot
Download APK Tools
Update the CA Certificates package so
curlcan verify the download:update-ca-certificatesSelect your desired Alpine Linux release. In most cases, you can use the latest stable release
Identify the current version of the
apk-tools-staticpackage. You will need to navigate into themain/x86_64directory of your chosen release in your web browser.For example, the latest stable version’s
apk-tools-staticpackage can be found athttp://nl.alpinelinux.org/alpine/latest-stable/main/x86_64/. From there, simply search forapk-tools-static. Once you’ve found it, copy the file’s location. To do this in most browsers, right click the filename and select Copy Link Address.Download and extract the
apk-tools-staticpackage to your Linode. You should still be working in the/alpinedirectory when performing this step. Replaceaddressin the following command with the address you copied in the previous step:curl -s address | tar xzPerform the initial distro installation. This will use the latest stable build of Alpine:
./sbin/apk.static --repository https://nl.alpinelinux.org/alpine/latest-stable/main/ --update-cache --allow-untrusted --root /alpine --initdb add alpine-base alpine-mirrorsThis should output a series of installation messages, followed by a message showing how many packages were installed and their sizes.
System Configuration
In this section, we will modify critical system files. It is recommended that you make backup copies before making changes.
Configure your filesystem table (fstab), entering a single hard tab between each column. This file specifies how each disk is initialized or mounted into the overall filesystem:
- File: /alpine/etc/fstab
1
2
3
/dev/sdb / ext4 defaults,noatime 0 0 /dev/sda /boot ext4 defaults,noatime 0 1 /dev/sdc swap swap defaults 0 0
Uncomment the line below to enable a serial console output. This gives you visibility over Lish when booting the installed system.
- File: /alpine/etc/inittab
1
2
# Put a getty on the serial port ttyS0::respawn:/sbin/getty -L ttyS0 115200 vt100
Create the GRUB 2 boot configuration directory:
mkdir /alpine/boot/grubCreate a new file,
grub.cfgwithin this directory, and add the following contents. This file specifies configuration options for GRUB 2 to use during the boot process:- File: /alpine/boot/grub/grub.cfg
1
2
3
4
5
6
7
8
set root=(hd0) set default="Alpine Linux" set timeout=0 menuentry "Alpine Linux" { linux /vmlinuz-vanilla root=/dev/sdb modules=sd-mod,usb-storage,ext4 console=ttyS0 quiet initrd /initramfs-vanilla }
Create a
mkinitfsdirectory:mkdir /alpine/etc/mkinitfsCreate a new file,
mkinitfs.conf, within this directory and add the following contents. This file specifies options for building the initial RAM file system (initramfs):- File: /alpine/etc/mkinitfs/mkinitfs.conf
1features="ata ide scsi virtio base ext4"
Copy the recovery system’s
resolv.conffile into/alpine/etc. Optionally, you can fill in your own choice of DNS resolvers.cp /etc/resolv.conf /alpine/etcIf you want to allow root logins over Lish, add
ttyS0tosecuretty:echo ttyS0 >> /alpine/etc/securetty
Install the Kernel
Bind the
/procand/devdirectories to the/alpinedirectory:mount --bind /proc /alpine/proc mount --bind /dev /alpine/devEnter the Alpine chroot jail:
chroot /alpine /bin/shSelect a mirror to use when downloading or updating packages:
setup-apkreposYou can select a mirror by entering its corresponding number, or
fto automatically pick the fastest mirror.Update your packages:
apk updateSet your hostname, replacing
examplewith a hostname of your choice:setup-hostname -n exampleConfigure important services to start automatically using Alpine’s OpenRC init system:
rc-update add networking boot
rc-update add urandom boot
rc-update add crond
If you’ll need other services, you can also add them now. The above is intended to serve as a starting point.
Install the kernel:
apk add linux-vanillaExit the chroot jail:
exit
Configure Alpine Linux
Reboot into Alpine
Reboot into the Alpine Linux configuration you made earlier by selecting the button next to the profile in the Linode Manager and clicking Reboot. If this is the only configuration profile, this can also be accomplished directly in Lish using the
boot 1command. If there are other profiles, you can substitute1with the list position of your Alpine profile.Note During boot, the output in Lish that networking fails to start. This is expected, and will be fixed shortly.Use Lish to log in as
root. You will not be prompted for a password since it has not yet been set.
Configuration
Set up and start networking. Alpine has a handy script that will configure the network interface file for you and guide you through the various options. It’s capable of advanced configuration, like bridging and bonding, but for a basic setup, its defaults should be sufficient.
setup-interfacesPress enter 3 times to accept the defaults of
eth0,dhcp, andno, then restart the networking service:service networking restartYour Linode should now have a functional network connection.
Set a root password:
passwdCreate a limited user account to avoid using root for all commands. Replace
example-userwith a username of your choice:adduser example-userInstall the
sudopackage:apk add sudoAdd your new user to the
wheelgroup:adduser example-user wheelAllow the
wheelgroup to temporarily elevate their privileges with sudo:sed -i '/%wheel/s/^# //' /etc/sudoersInstall and configure the SSH daemon (SSHD). Alpine has a simple setup script to handle this:
setup-sshdWe recommend the
opensshserver if you want full SFTP access.dropbearis a more lightweight option, although it only provides SSH access.
Next Steps
At this point, you should be able to connect to your server via SSH. Alpine is very lightweight, and doesn’t install very much unless you ask it to.
Install Packages
Alpine’s website provides a searchable library of available packages .
A few packages to consider:
- Text editor:
nanoorvim - Web server:
lighttpd,apache2, ornginx - Scripting languages:
php,perl, orpython - Database servers:
mysqlorpostgresql
Note that some of these combinations may require additional dependencies. To install a new package, use the following command, replacing package with the package name(s):
apk add package
For example, to add Apache, PHP, and MySQL:
apk add apache2 php mysql
For more information, see Alpine’s wiki page on package management .
Secure Your Server
Before using your Linode in a development or production capacity, make sure you’ve taken some basic security precautions. Our
Securing Your Server
guide provides a good starting point but you should also research additional, Alpine-specific security options. Keep in mind that most security packages (e.g. iptables.) will need to be installed.
For more information, refer to their wiki page on security .
More Information
You may wish to consult the following resources for additional information on this topic. While these are provided in the hope that they will be useful, please note that we cannot vouch for the accuracy or timeliness of externally hosted materials.
This page was originally published on


